SocialX WhatsApp chat application is designed to be an intuitive and easily customizable application, that lets store owners use Whatsapp for support.
[Step 1] Accessing SocialX Dashboard
The installation process starts from the SocialX dashboard. Here is how you access the SocialX dashboard and begin the installation.
1. After installing the SocialX app, select SocialX from the list of installed apps.
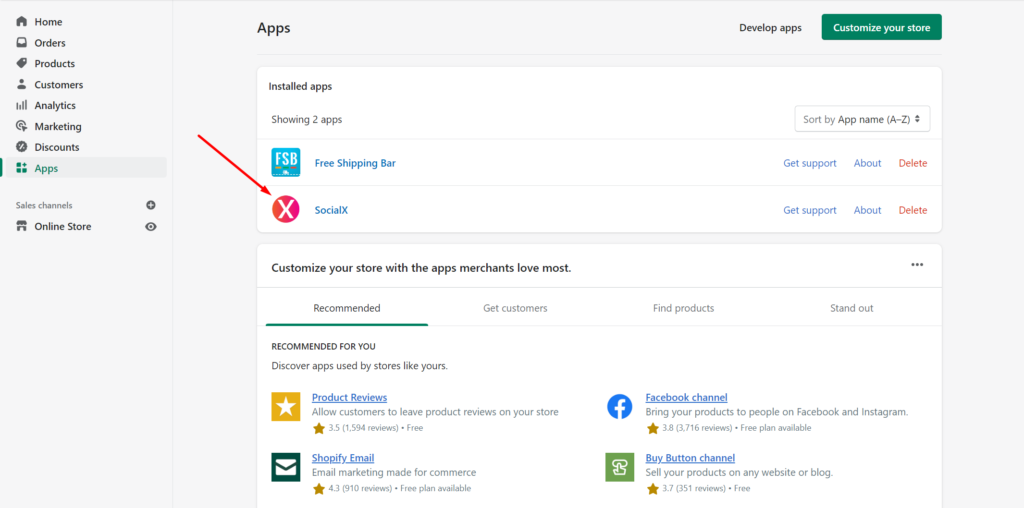
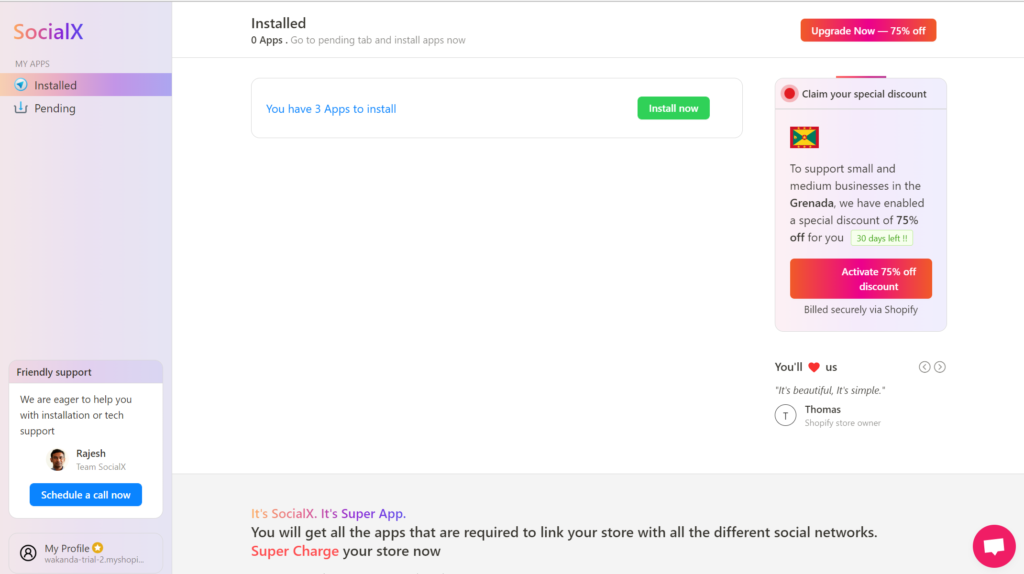
2. Once you select SocialX from the list of installed apps, you will be redirected to the SocialX dashboard as shown below.
[Step 2] Installing WhatsApp Chat App
Here is how you integrate the WhatsApp chat widget to your store.
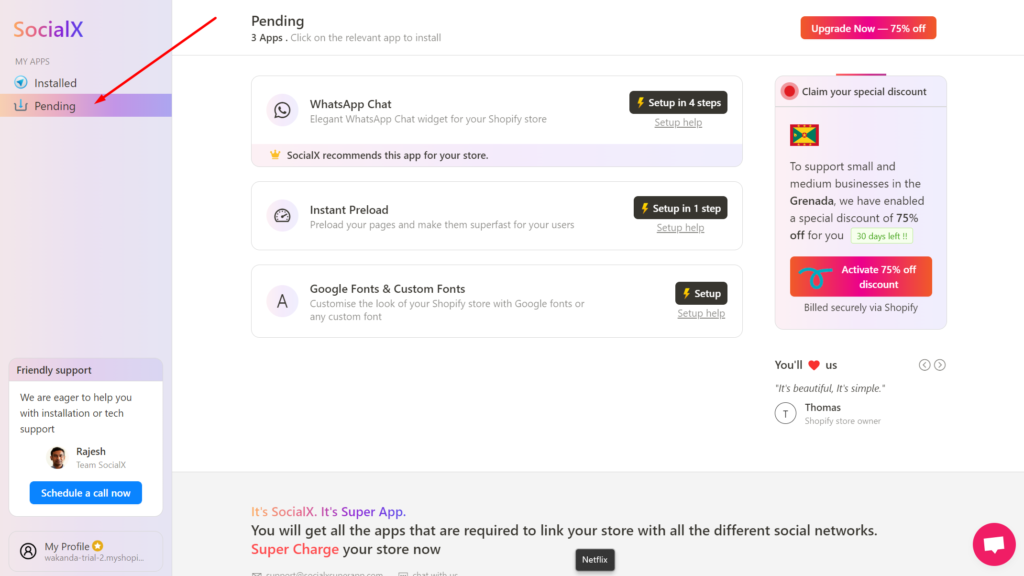
1. Navigate to Pending from the left side menu where you can see the list of apps that are pending installation.
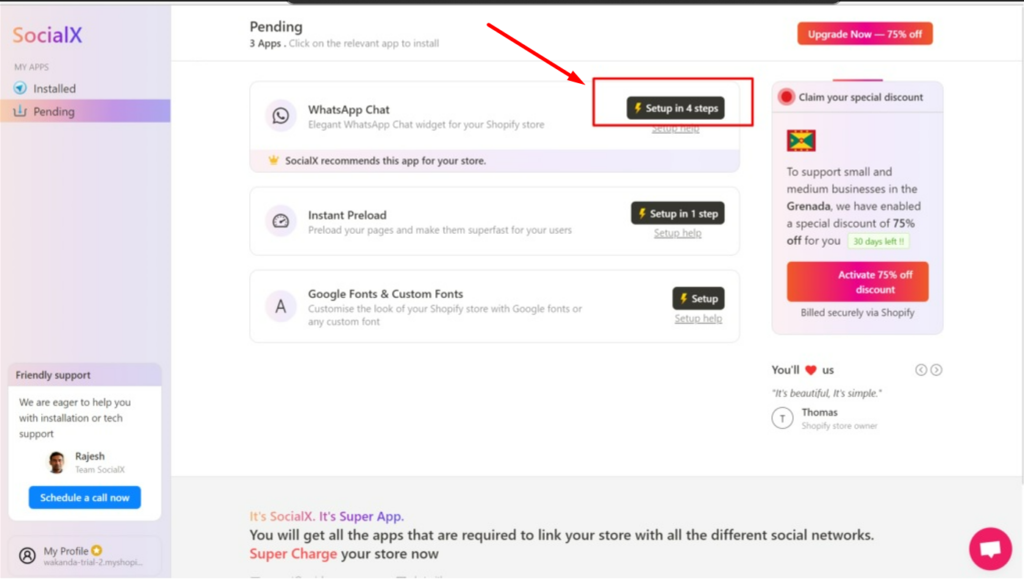
2. Select the Setup in 4 steps button adjacent to WhatsApp Chat.
3. Select Let’s Install It as shown in the image below.

Setting Up The WhatsApp Widget
SocialX was designed with intuitiveness at its core to ensure that store owners can start using the app right away in a few clicks. Here is how you can set up the WhatsApp widget.
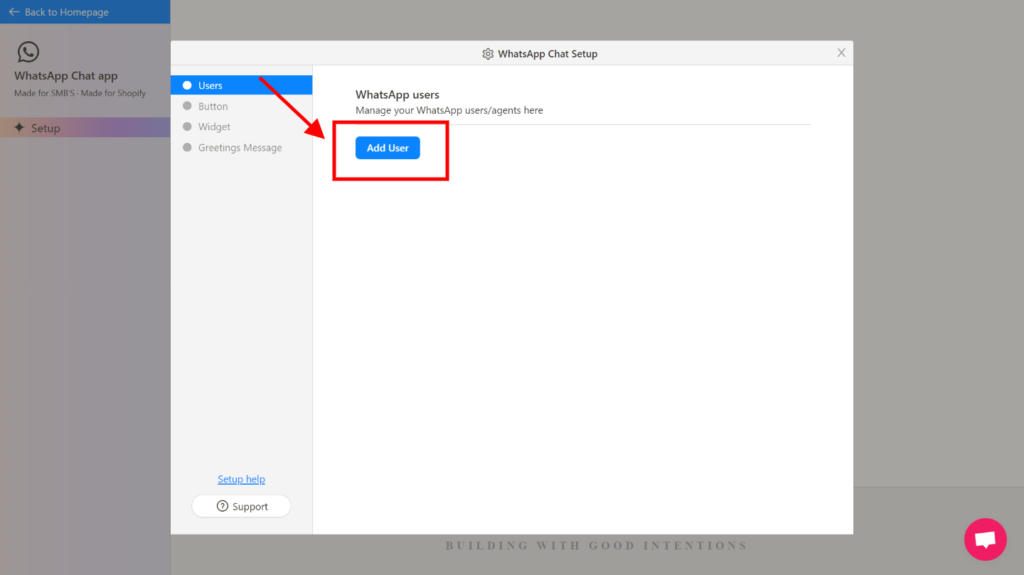
[Step 3] Adding Users
1. The first step in the installation includes adding your agents/users to your store WhatsApp chat support. To add users select Add User.
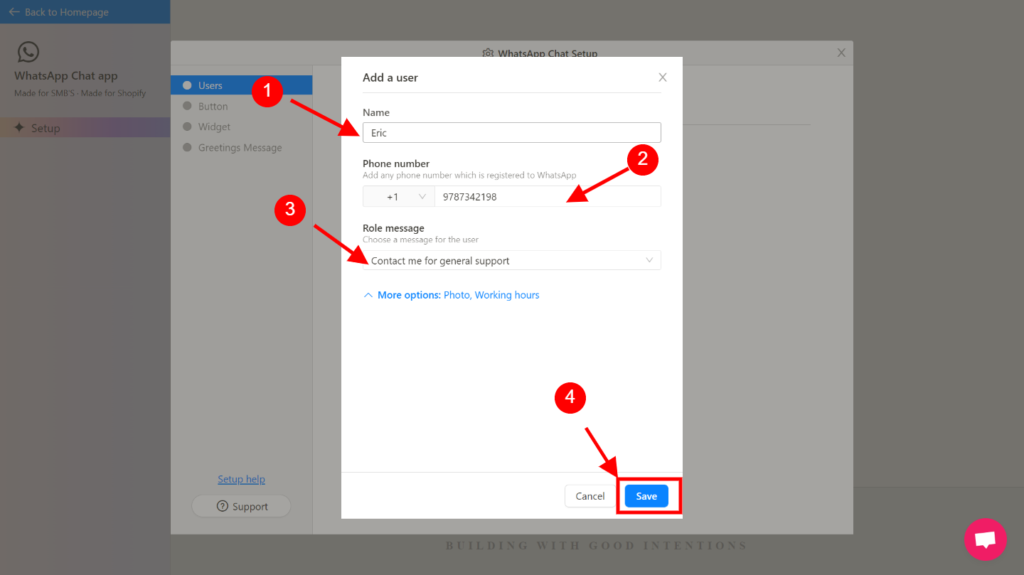
2. Enter the name and phone number of the new user and also select a role message from the dropdown and click Save. You can also set a custom role message.
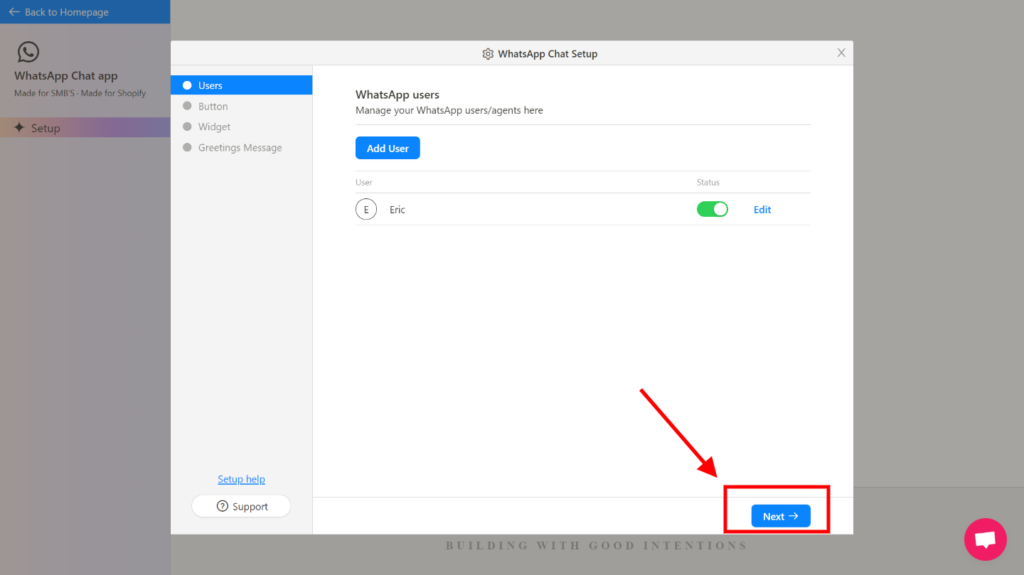
4. Select Next.
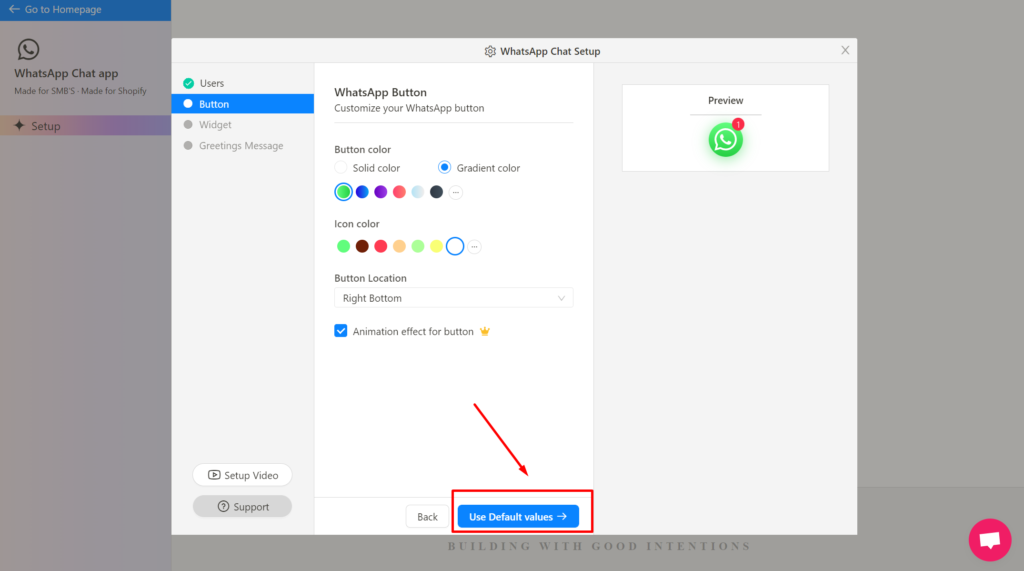
[Step 4] Configuring Button, Widget & Greetings message
1. Once you click Next you will be redirected to the dashboard where you can customize the WhatsApp chat widget. You can either choose to customize the button or proceed with the default values. In case you want to customize the widget, here is an article to help you.
In this guide, we choose to go with the default values.
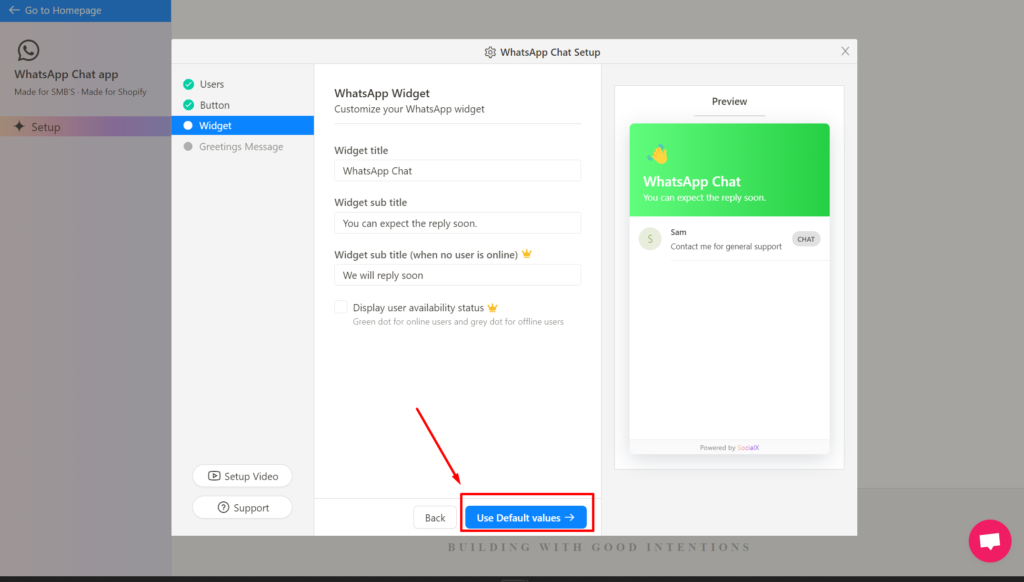
2. Next comes the dashboard where you can customize the WhatsApp widget. As said previously, you can either choose to customize the widget or proceed with the default values. In case you want to customize the widget, here is an article to help you.
In this guide, we choose to go with the default values.
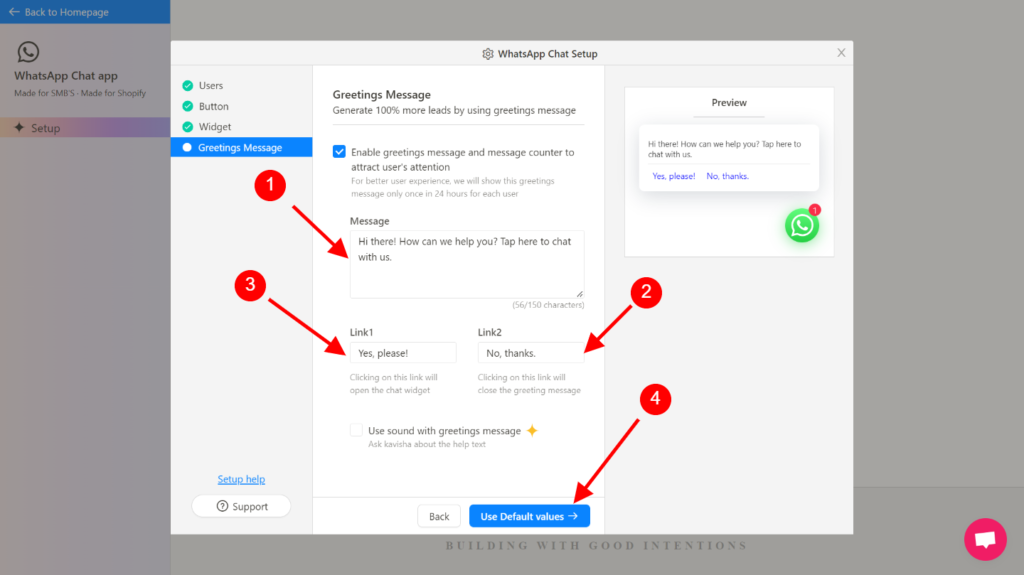
3. Next step involves customizing the greetings message and setting up chat automation. Enter the required information and click Done.
[Step 5] Validating the installation
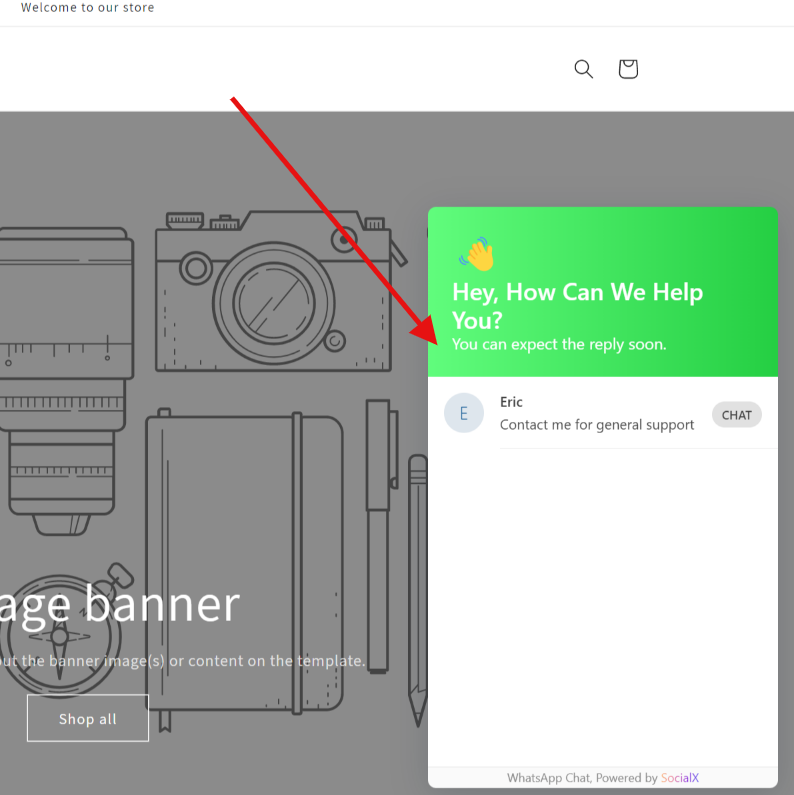
1. Navigate to your store and check if the widget is active or not.
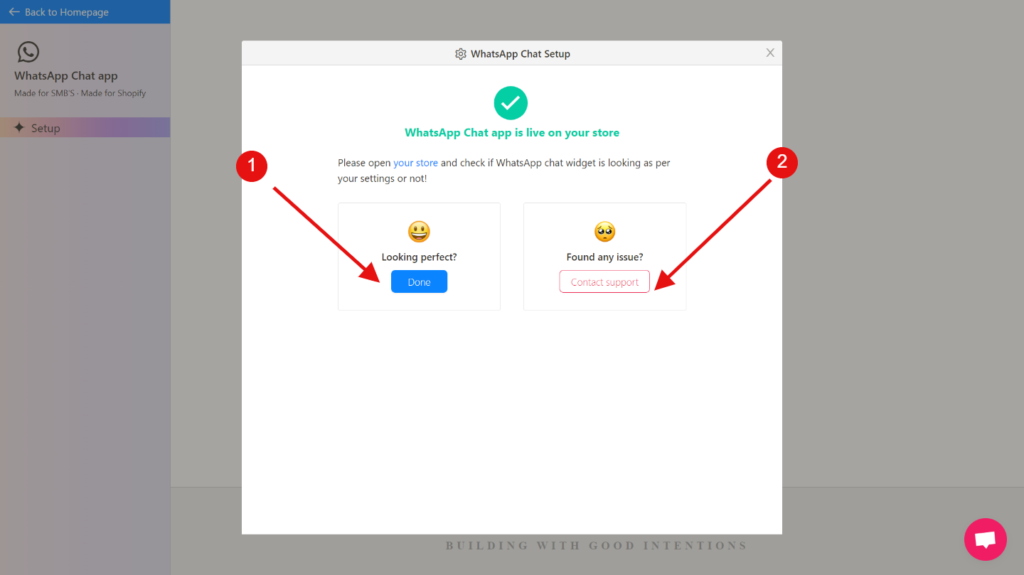
2. If the app is installed select Done. If it is not , you can try installing it again or contact support.
More Help?
We hope you found this guide helpful. If you have any queries or need further assistance, feel free to reach out to us.